
The 1×5 long bar is one of the easiest pieces to underestimate in Game Block Blast Online. It looks simple, but it can end a run fast when the board has been chopped into short gaps and awkward corners. The safest approach is not to hope it fits later. Keep at least one reliable five-cell lane open, avoid fragmenting the grid, and place smaller pieces in ways that preserve future options.
That does not mean you should play timidly or refuse good clears. It means you should treat the long bar like a piece that needs a runway. If your board can still support a straight run of five cells, you can usually work around it. If you keep breaking the grid into isolated pockets, the long bar stops being a useful tool and starts looking like a dead draw.
Why the 1×5 piece causes so many losses
The long bar is dangerous because it has only one shape. Unlike squares or L-shaped pieces, it can’t bend around a bad board. If there isn’t a straight horizontal or vertical run of five empty cells, it simply has nowhere to go.
That sounds obvious, but the real problem is that Block Blast boards often fail gradually. A player sees five empty cells on the grid and assumes the long bar is safe. Then the board turns out to have five empty cells split across different rows, tucked behind corners, or separated by other blocks. Total space is not enough. The shape of the space matters.
This is why the long bar punishes sloppy board management. It exposes whether you’ve been building open lanes or just chasing the easiest immediate placement.
How to keep a usable lane open
The core survival rule is simple: preserve at least one five-cell horizontal or vertical run whenever you can. Not every move has to protect it, but your board should usually keep one part of the grid straight enough to accept the long bar.
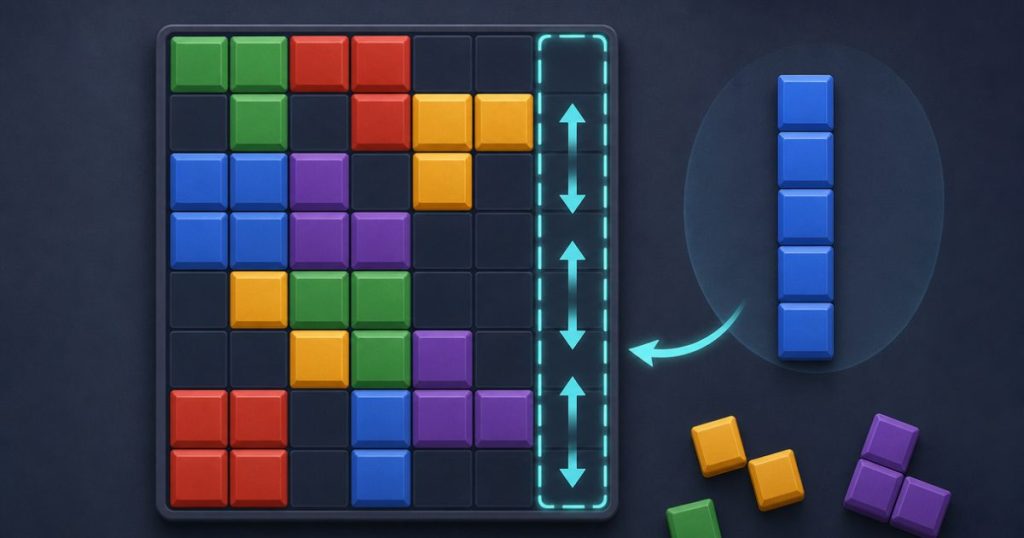
A useful habit is to think in terms of a reserved lane. That lane doesn’t have to stay empty forever, but it should stay readable. If the board has one long edge, one clean column, or one broad interior stretch that still feels straight, that’s your insurance policy.
When the board is still open, prioritize placements that keep lines continuous. A move that fills a small pocket might score immediately, but if it cuts your lane into two shorter pieces, you may have traded a safe future for a tiny present gain.
What a safe lane looks like:
- A clean row with at least five consecutive empty cells.
- A clean column with at least five consecutive empty cells.
- A wide open edge where future pieces can be stacked without breaking the run.
- A straight interior channel that stays unblocked by scattered single cells.
What a dangerous board looks like:
- Several empty cells scattered in small pockets.
- Two- and three-cell gaps everywhere, but no uninterrupted five-cell run.
- Spaces that look large at first glance but are split by filled blocks in the middle.
- Boards where every move creates another isolated hole.
One easy mistake is to fill a lane simply because it is available. If you only have one five-cell run left, think twice before using a piece that destroys it unless that move also creates a stronger board state right away.
Placement priorities when the board is still open
When the grid still has room, the long bar is less about rescue and more about discipline. The best move is not always the move that clears the most lines. It is the move that keeps your next few turns flexible.
If both horizontal and vertical placements are possible, choose the one that leaves the board easier to work with afterward. There is no universal rule that says the long bar should always go one way. The right orientation depends on where the board is open, which side is becoming crowded, and which move preserves the most follow-up placements.
In practice, a strong choice often does one of these things:
- extends an existing straight lane instead of breaking it;
- completes a row or column and opens nearby space at the same time;
- keeps the center from becoming too chopped up;
- creates room for awkward pieces you may draw later.
Here’s the key difference between a greedy move and a flexible move. A greedy move may clear a line now but leave the board with no clean straight run. A flexible move might clear less immediately, but it keeps multiple future placements alive.
That usually matters more than one clean-up turn.
What to do when the board is cramped
Once the board starts tightening, the long bar becomes a recovery tool. This is where many players panic and place it anywhere it fits, which often makes the board worse. The better approach is to use it to reconnect space, not just to occupy space.

If you have a choice, place the long bar where it can finish a row or column and open adjacent space after the clear. The goal is not only to fit the piece. The goal is to improve the board shape that remains.
There are two useful recovery patterns:
- Finish a nearly complete line. If the bar clears a row or column and the resulting board opens a larger working area, that’s a strong survival move.
- Bridge a cramped area into a straight run. Sometimes the board is messy but still has a nearly continuous lane hidden behind a few blocked cells. Clearing the right line can reconnect that space.
If the board is already crowded and you’re trying to choose between two placements, step back and treat the move as damage control rather than scoring. A careful recovery turn often matters more than forcing a high-value clear. If the board has already become difficult to manage, a broader recovery method like this 3-step crowded-board approach can help you reset your priorities.
Sometimes the best long-bar play is to use it sooner than feels comfortable. Holding it for later is only useful if later still leaves you a valid straight lane. If the board is on the edge of fragmentation, waiting can make the piece unusable.
What to do when you don’t have a clean five-cell run
Not every board can be saved with a perfect lane. Sometimes the grid is already broken up, and the long bar has no obvious home. In that case, stop asking where the piece fits and start asking whether you can make it fit on the next turn.
That means choosing placements that reconnect the board instead of widening the mess. If a smaller awkward piece would block the only possible five-cell lane, it may need to be placed first, even if it is less satisfying. The long bar is often saved by the move that looks less impressive.
A nearly full board can still be rescued if you can reopen a straight run by clearing one critical line. The important part is not to keep adding random blocks to already fractured space. Once the board is broken into too many islands, the long bar becomes nearly impossible to place.
If the grid feels beyond repair, your best shot is usually to look for one move that consolidates space rather than three moves that each make things a little worse. This is where patience matters. A desperate placement in the wrong gap often removes the last possible lane.
Common mistakes that make the long bar unplayable
Most long-bar losses come from a few repeat mistakes. If you avoid these, you’ll survive the piece much more often.
- Breaking one straight lane into two shorter runs. Five cells scattered across a board do not help. The bar needs one continuous lane.
- Filling every obvious gap too early. A board that looks tidy can become fragile if there is no straight run left anywhere.
- Ignoring the shape of empty space. Five empty cells are not the same as a usable five-cell lane.
- Saving the long bar at all costs. Sometimes it should be placed early if that clears space and preserves the board. Hoarding it can make the run worse.
- Choosing the orientation by habit. Horizontal is not always better than vertical, and vertical is not always better than horizontal. The board geometry decides.
Another common trap is treating the long bar as a scoring piece instead of a board-shaping piece. It can help clear lines, but its bigger value is how it changes the board after the clear. If the placement leaves you with more straight space and fewer dead zones, it was probably the right move.
Players often run into trouble when they focus only on the next placement and ignore the board two turns ahead. Block Blast rewards flexibility. The long bar exposes whether you’ve been protecting it.
Early, mid, and late board states need different habits
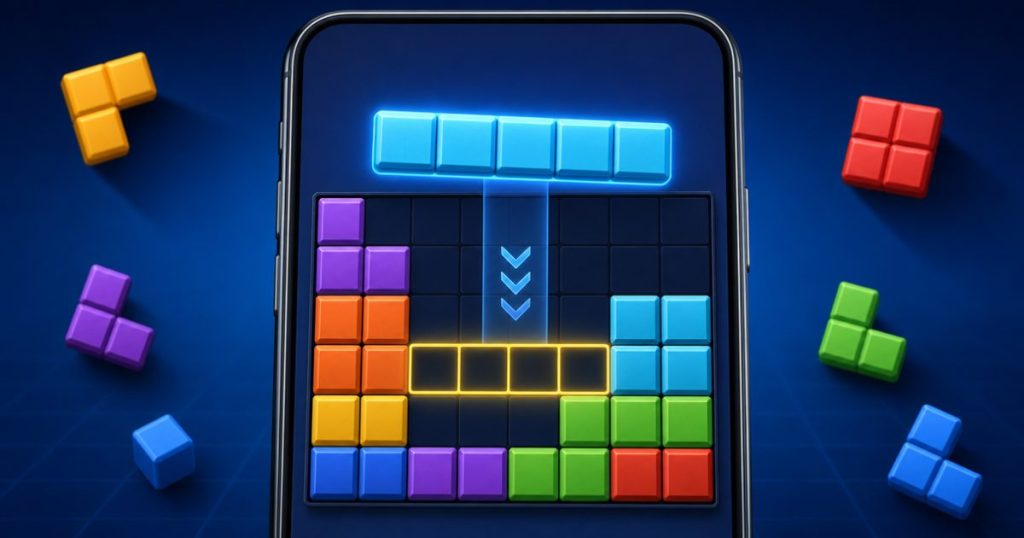
Early game: Build open structure. This is the easiest time to preserve a five-cell lane, so don’t clutter the board with unnecessary fragments. Place pieces in ways that keep rows and columns easy to extend later.
Mid game: Start protecting one or two long runs. You do not need the whole board to stay open, but you do need at least one straight stretch that can absorb the 1×5 piece when it appears. This is also the stage where bad habits start to snowball.
Late game: Treat the long bar as either a rescue tool or a final test of board shape. If you still have a clean lane, use it carefully. If you do not, your only hope is usually a move that reconnects space or clears a critical row or column.
The earlier you notice the board becoming fragmented, the easier it is to fix. Late-game recovery is possible, but it gets much harder once every move creates another dead end.
A quick decision rule for the 1×5 piece
Before placing anything, ask three fast questions:
- Do I still have a clean five-cell lane somewhere?
- Will this move preserve that lane or destroy it?
- If I use the long bar now, does it open more useful space afterward?
If the answer to the first question is no, your next move should be about rebuilding a lane, not chasing points. If the answer to the second question is yes, the placement may be worth more than it looks. And if the third answer is yes, the long bar is doing real work instead of just occupying space.
That simple check is usually enough to stop the most common losses. The long bar is not hard because it is special. It is hard because it punishes sloppy spacing. Keep one lane alive, avoid fragmenting the grid, and use the piece to improve the board rather than just survive one turn.
Frequently Asked Questions
Why does the 1×5 piece cause so many losses in Block Blast?
Because it only fits in a straight run of five empty cells. A board can have empty space and still be unable to place it if that space is broken into small gaps.
Should I save a lane for the long bar or take the best scoring move?
Usually save the lane if the move would fragment the board. A small score gain is not worth losing your only reliable five-cell placement.
Is horizontal placement better than vertical placement?
No. The better orientation depends on the board shape. Use whichever direction preserves more open space and leaves stronger follow-up options.
What if my board has no clean five-cell run left?
Stop trying to force the long bar into a bad gap. Focus on moves that reconnect space or clear a line so a straight run opens up again.
If you remember only one thing, make it this: the 1×5 piece needs a straight lane, not just empty cells. A board with one protected run is much safer than a board with scattered space that looks open but can’t accept the long bar.
When the grid starts to tighten, choose moves that preserve flexibility first and score second. That habit won’t save every run, but it will keep far more boards playable long enough for the long bar to help instead of hurt.


